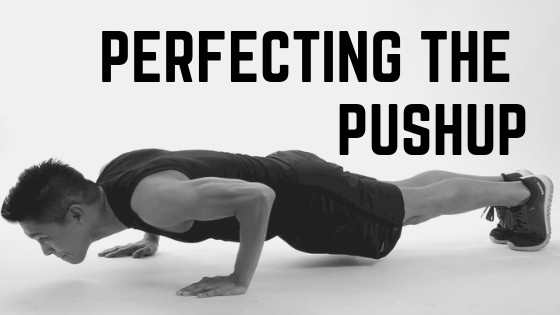
Ah, the push-up. The exercise everyone either loves or hates. I think it all comes back to high school gym class when we were told that in order to see how strong we were we had to drop to the ground and see how many we could push out. Well, whether you love or hate them, Push-ups can do wonders for your upper body.
“…men that were able to complete 40 consecutive push-ups had a 96% reduction in the incident of CVD (Cardiovascular disease) events”
Harvard Study
A push-up is a perfect exercise at home or on the go. Push-ups will target your Chest (Pectorals), shoulders (deltoids), and arms (triceps). While the push-up is an efficient and effective exercise, I have noticed that many people can struggle with push-ups and even experience shoulder pain during and after the exercise.
Parts of this article were utilized in the How Stuff Works article about Push-ups.
Common mistakes and poor positions
Shoulders –
A common mistake when performing a push-up is to let your shoulders drift forward while you are lowering yourself to the ground. When performing a push-up we want to have our shoulder blades retract behind us as we lower down to the ground. This will put your shoulder into the correct position and will shift more of the tension into your chest muscles as opposed to the front of your shoulders.
The second common miscue in push-ups is when your elbows flare out to the sides. With the elbows in this position, the shoulder blade tends to round forward and greater stress is placed on your shoulder joint and musculature. To fix this be sure to keep your elbows pointing behind you (a 45-degree angle away from your body)
As you lower yourself to the ground let your shoulder blades squeeze together and your elbows to point behind you. Keep your shoulders back as you drive through your elbows and press your hands into the ground.
Core/Glutes –
When our core starts to fatigue our hips will start to drip. This will cause a curvature in your lower back that we want to avoid. When we are unable to hold our core and glutes tight and in a straight line, it is either time to rest or move to a higher hand position since we cannot complete the exercise with proper form.
Scaling the Push-up
The most common way people scale (make easier) a push-up is to drop down to your knees. This reduces the amount of weight you will have to push due to the lever point (knees) is closer to your hands. However, when people perform push-ups in this way they tend to keep their bums in the air and lower their faces and shoulders towards the ground. This can lead to ineffective exercise and potentially lead to shoulder pain or injury.
A better way to scale the push-up is to place your hands on a surface higher than the ground, such as a couch, bench, or even countertop. This will allow you to keep your feet together, bum (glutes) and core (Abdominals) tight throughout the movement. Keeping your hips and core tight during the movement will help keep your spine in the correct form while performing this exercise. As you gradually build strength you will be able to perform your push-ups at a lower and lower level.
For a great workout, start with your hands on the ground and perform as many reps with good form as possible. When your form starts to break, then move to a higher hand position and repeat. Continue this process until you cannot complete a push-up with good form, or if you run out of higher hand positions.
Targetting different muscles
When we perform a push-up we will hit three main muscle groups (Chest, Shoulders, and Arms). Sometimes we want to focus more attention on one particular muscle group over the others. To achieve this we can make small adjustments to our form to shift the emphasis to the desired area.
Shoulders
To shift our focus to our shoulders, we will elevate our hips into the air. Your body will look like an A-Frame, this is commonly referred to as a pike or downward dog position. From here we will lower our head towards the ground by letting our elbows bend. Our elbows should be pointed out to the side as we carefully, (we don’t want to faceplant) lower ourselves towards the ground. Once we have lowered ourselves as far as our arms, or head, will allow us to, we will press our hands into the ground and return to the Pike position. While performing this version of the exercise be sure to keep your shoulder blades pulled back and down.
Chest
A traditional push-up will focus a majority of the tension on our chest. However, if we want to place even greater tension on our chest we won’t change our position, but change our intention. As we perform a push-up, instead of focusing solely on pressing your hands away from you and into the ground, you will focus on our elbows and try to push your hands together.
To properly activate the chest we want to bring our elbows closer to the middle line of our body. This is easy to do with exercises like a chest fly or pec deck, but since our hands are fixed on the ground with a push-up our arms can only travel so far. Instead what we will do is think about pressing our elbows down and towards each other. Your chest muscles are attached to your upper arm. When we focus our attention onto our elbows as opposed to our hands we will feel a stronger contraction in our chest.
Also by thinking about pressing your elbows towards each other, you will activate more of the musculature in your chest as opposed to your shoulders.
Triceps
To target your triceps you will bring your hands in closer to your body. A common mistake is to place the hands into a diamond shape to perform the push-up. While this will put a greater amount of tension on your triceps, it can lead to elbow and wrist strain. A better way to shift focus onto your triceps is to place your hands shoulder-width apart and even with the middle of your rib cage.
When performing a push-up in this manner it is imperative to keep your shoulders retracted and your elbows close to your body. Instead of lowering yourself all the way to the ground, which will shift focus onto your shoulder, we will only lower down until your arms are at 90 degrees or are even with your torso. Press the heel of your palm into the ground, think about the back of your arm tightening up, and return to your starting position.
Your Push-Up Challenge
This week I would like for you to see how many push-ups you can do with proper form. That can be from the ground, the sofa or even a countertop if need be. During the week I would like for you to take your initial number of push-ups (let’s say 10) and divide that by 2. I challenge you to do that number of push-ups 3 times per day.
For example: Initial number of push-ups = 10
Your Challenge: 3 sets of 5 push-ups per day.
At the end of the week, I want you to retest your push-ups to see how your number has increased. Now you may be saying “why does it matter if I can do 1 or 40 push-ups?”
I’m glad you asked. In a recent Harvard study, they found that men that were able to complete 40 consecutive push-ups had a 96% reduction in the incident of CVD (Cardiovascular disease) events compared with those completing fewer than 10 push-ups.
Now, am I saying that if you can do push-ups you won’t have a cardiac episode? No. I think the correlation between the push-ups and cardiac events is more closely linked to the individual’s body weight. After all, the more they weigh, the harder a push-up is.
But, if you ever needed a reason to learn to love push-ups, that’s good enough for me.

